2008 Archive

Shout Out to Marc Krolczyk – Sr. Interaction Designer at Kodak

Fri, 26 September 2008

My good friend Marc Krolczyk did a nice interview on the Official Kodak blog 1000 Words. He has been a fixture in the Rochester design scene for more than 10 years, dedicating his Masters in Communication Design from University of Buffalo to a long career at Xerox as a UI designer. Recently Kodak wooed him away to apply his talents on digital cameras and other new digital products. It will be great to see Marc’s touch on the Kodak Product User Experience. He has an endless supply of innovative ideas for how products and their interfaces should work in our everyday lives. I know he’s pumped for the new assignment, and I can tell his mates are pumped to have him there. Marc Krolczyk. Real American Designer.

Marc Helmet
Marc beta testing a new “Monthy Python” image quality setting on his camera

Posted in: Interactive Marketing for Staffing Firms, Workplace | No Comments »
Share/Save/Bookmark

Mason and Anna Do HSM3 Jib Jab Style

Wed, 24 September 2008

Mason and Anna just love the Jib Jab movies. Since I’m away on business I thought I’d post one for their must-see Disney movie High School Musical 3.

Try JibJab Sendables® eCards today!

Posted in: Life, Movies | 2 Comments »
Share/Save/Bookmark

A Salmon and a Dancing Hula Girl

Sun, 21 September 2008

Yesterday was a beautiful September morning. I convinced my friend Scott to get up early and join me for some salmon fishing off the mouth of the Genesee river on Lake Ontario. While Scott drove the Fish Fry I worked on setting the lines. As I was choosing which fishing rods to use, I saw the rig I took from my grandfather’s basement earlier this summer after he passed away. Even though it had 15 year old line on it, I asked grandpa if he’d help me out this morning with some luck. I put onto that rod, the lure I affectionately call “the dancing hula girl“. It’s a green Spin Doctor with an Atomik Fly (like this guy used) trailing behind it. It is a weird rig that I’ve never caught a darn thing on. I put down a good variety of other spoons and had the lines set by 6:45am.

Scott and I were chatting and not paying attention, and I looked over his shoulder from the drivers seat at about 7:15. I said “Hey, Scott!!! That’s a fish, could you go grab that?!” So he jumped up and grabbed the rod. With the line zipping out, I cleared the rest of the downrigger lines, then I grabbed the camera and shot this quick video:


Scott Ingraham catching his first big salmon

The fish fought for about 15 minutes, and at one point was more than 200 feet off the back of the boat. It was good to see Scott start to fatigue a bit as he got his first taste of horsing in a big one. Finally we tired out the salmon more than Scott, and unlike last year, I actually had a big enough net to get the fish in the boat.

Scott’s Salmon
15 lb. King Salmon

Kris with salmon
Striking a pose with the catch of the day

It was awesome to find out that the fish came on grandpa’s rod, and the ‘Dancing Hula Girl’. Thanks gramps, that was pretty cool! Scott and I both had a big smile on our face the rest of the morning even though we never got another hit. I went home and cleaned our fish, then Tricia and I cooked it for dinner on the grill. Grilled salmon marinated in Santa Fe Marinade is mmm…mmm…good.

This was enough excitement to last me until next year. I think Scott was pretty pumped because when I dropped him off his vacuum packed fillets at church today (good charter captain I am) he still was sporting that grin. Thanks for a fun morning Scott!

Posted in: Fishing, Life | 1 Comment »
Share/Save/Bookmark

DIY Basement Workout Room Step 3: Electricity and Ceiling the Messy Way

Sun, 07 September 2008

With the wall insulation installed, it was now time for me to figure out the electricity for the basement workout room. I’m definitely NOT an electrician, so this posting isn’t going to give you any details on how to run circuits. I had a friend who knows what he’s doing stop by and help me plan out the circuits. Here’s a few decisions we made that might be helpful.

  • We decided on some 20Amp outlets for the treadmill and other heavy-load equipment.
  • The basement already had 1 lighting circuit, so we planned a second, new lighting circuit to be run from the box. We planned it as a 3-way circuit so that the workout room could be switched from 2 different switches entering and exiting the room.
  • We created a dedicated circuit just for the sump pump so that there would never be a potential overload on that circuit
  • My advice to you is to Google the different things you need to install + circuit diagram, and you’ll get VERY useful resources like this 3 way circuit diagram. These diagrams, plus my friend’s advice lead me to the store to get all the wire and boxes I would need.

    How I ran the Electric in the Styrofoam Insulation
    First, we needed to figure out how we’d attach electrical boxes with the lack of studs in the walls. Sure, I could have attached the boxes directly to the block wall and cut the Styrofoam panels around them. I wanted to poke as few holes in the Styrofoam as possible to retain its insulation factor. So, we chose to use old work plastic electrical boxes. These are the kind that get attached via tabs to the back of the dry wall instead of to the studs. While you may argue this is a less secure solution for the electrical boxes, it ended up being far easier to install and secure enough for my needs when all was said and done.

    The installation guide recommended running the electric wires behind the Styrofoam board. I wanted to be able to easily see my wiring paths so I chose to embed the wiring on the front of the styrofoam. First, I drew lines with permanent marker on the foam board to all of my proposed electrical outlet locations. I created a template out of cardboard that provided enough clearance for the electrical boxes and traced those in the electrical box locations.

    Here’s where the job got messy. To be able to easily cut the paths in the Styrofoam, I purchased a 5/8″ bit for my plunge router. Then I went crazy routing out the paths. Luckily I had tarped off the other parts of the basement, because the Styrofoam bits went everywhere! Make sure to wear safety goggles and a breather because the bits are not kind to your eyes or lungs. Have a look at the pics of me in action to get a sense of the mess.

    Routing out the Electric paths
    The paths were drawn in marker and I ran the router over the lines.

    Covered in Styrofoam dust
    A router can make a huge Styrofoam cloud

    To get the paths behind the furring strips just use a half inch drill bit and drill behind both sides of the furring strips. After all of the paths were routed out, I easily ran the rough wiring to all of the electrical box locations, leaving plenty of wire to finish things off after the boxes get installed with the drywall.

    Painting the Ceiling with a Wagner Power Painter
    While the walls were still bare it was time to make a crucial decision – how to finish the ceiling. We considered all of the various finishing options and finally arrived at an approach I’ve used once before; painting the ceiling with a Wagner Power Painter. Here’s why painting the ceiling makes a ton of sense for us.

    1. It’s a LOT cheaper. A tile ceiling with all of its associated hanging hardware would have cost $600-$1000. Painting the ceiling cost us two gallons of paint, about 40 bucks.
    2. It’s a lot higher. When I’m working out, I need all the space I can get for my monkey arms. Not having a drop ceiling saves us a precious few inches.
    3. It’s a lot more accessible. No ceiling tiles to mess with if you need to get at wiring or plumbing in the floor joists.
    4. It’s a lot easier and faster. Installing a drop ceiling takes a ton of time to install the grid work, cut the tiles, and soffet all of the irregular areas. Painting is a one shot deal that can be finished in a few hours.

    Choosing Your Paint Color
    Think of this ceiling method as the coffee shop, or industrial approach. We’ve all been to those trendy places with the exposed beams and pipeworks, same idea with your basement. I think the best colors to choose are anything dark. At my last house we used black. In this case, we used a dark gray. I’ve also seen dark brown and terra cotta – both look good. The ceiling just fades into the background not drawing your eye’s attention. What doesn’t look good in my opinion is a white or light painted ceiling. As soon as you enter a basement with the white painted beams, your eye is immediately drawn to it making it a lot more noticeable.

    Ceiling Paint Supplies
    If you choose this approach you’ll need a few critical supplies.

    1. Wagner Power Painter. Mine is the Wagner 5.4 Wideshot
    2. Floetrol or similar paint additive to thin your latex paint for spraying
    3. Latex Paint. I used 2 gallon of Eggshell finish for approximately 600 Sq ft.
    4. Rubber Gloves
    5. Protective head scarf, safety goggles and high quality breather
    6. Masking materials – tape, plastic, etc.

    Make sure to mask off anything that you do not want painted. Tarp doorways and passages to other rooms in your basement. Turn off your heat and/or air conditioner so that the fumes do not travel through the house. Open any basement windows you have for ventilation.

    Making the Big Mess
    Prepare yourself…this is going to make a big mess. By the time you are done painting, you will have paint dust all over your floors. Put the hood on your head, your rubber gloves on, and put on your safety goggles. Then fill your paint container with paint and some Floetrol and stir it up. Then go nuts spraying that ceiling. I like to have a scrap board nearby to take my initial spray shots so that the paint is flowing smoothly. Have a look at the pictures of Darth Painter to see it in action.

    Paint Vader 1
    I am your father…

    Paint Vader 2
    This sure beats painting with a brush

    Paint Vader 3
    Spray it on nice and thick to cover every nook and cranny

    In my next entry I’ll catch you up on our mudding and taping fun, show you the closet that will contain the sump pump, and I’ll show you the rubber floor installation.


    DIY Basement Workout Room: Step 1 | Step 2 | Step 3 | Step 4 | Step 5

Posted in: Home Improvement, Life | 6 Comments »
Share/Save/Bookmark

DIY Basement Workout Room Step 2: Insulating the Walls

Thu, 28 August 2008

Who knew that one of the most time consuming tasks in finishing the basement would be figuring out how to construct the walls. I agonized over the approach I would take, knowing that the wrong decision could cause me to tear down everything and start over. I hope my story here will help you make a good decision too.

The Walls I’m Working With
My house was built in 2005. We chose the particular lot we are on because it seemed like high ground with respect to other homes in the neighborhood. The walls are constructed of 12 courses of cement block which, despite my location, get saturated in different areas during heavy rains. I was shocked that a brand new basement could be so porous to water. I don’t get streams, but I would not say the basement is bone dry either. If we run a dehumidifier on high after a few days of dry weather the walls will dry out.

Last year I called EverDry in frustration, hoping that they could diagnose the water problem and propose a remedy. After the doom and gloom sales pitch of the dangers of deadly mold and crumbling foundations, their solution came out to a cool $17,000. It involved digging out around the outside of the foundation, trenching the interior perimeter of the basement and installing an industrial dehumidifier. This would guarantee dry block and also $17k less in my bank account. I decided to finish the walls without the massive expense, but the specter of water made my decision making far more stressful.

The Vapor Barrier Decision
The builder had originally planted the seed that putting a vapor barrier against the block walls (even if damp) leaving an airspace, and installing 2×4 studs would be a suitable way to finish the walls. I had a ton of questions about EXACTLY what to do though.

  • What kind of plastic should I use?
  • How far away from the walls should the studs be?
  • Should I install fiberglass insulation between the studs?
  • Do I need a pressure treated floor plate?
  • The most nagging of all questions: Will the walls get wet on the inside if I use this approach?

To answer my questions I followed Google to this great forum entry on how to vapor barrier a basement. There were some differing opinions, but THE BEST resource was referenced; Building Science Corporation’s Basement Insulation Systems Guide. Hallelujah! This is the advice given to builders on how to insulate/finish a basement. It has detailed pictures of the effects of what my builder had suggested (putting up a plastic vapor barrier and insulation)…it retains water and mold. MY solution was found on page 13 of the guide which explains the use of extruded polystyrene insulation and furring strips.

The Dow Styrofoam Solution
With a solution in mind I went looking for where I could find this extruded polystyrene (EPS). Lowes saved the day again. I found 2″ thick EPS sheets in either 4×8′ or 2×8′ tongue and groove sheets. Then I wanted to know how to install the stuff. Lo and behold the Dow website has this very thorough Dow Styrofoam Wallmate XPS Installation Guide. It gave me the plan I needed to purchase the rest of my materials, which included 1×3 furring strips for every 2′ and plenty of Tapcon screws.

A Special Note on the Tapcon Screws
For my project thickness the right size Tapcon screw was the 1/4″ x 3 3/4″ HEX head Tapcon screws. First, they are the thick ones to prevent any chance of them snapping on me when I installed them. Secondly, you MUST use the hex head for ease of screwing it into concrete. Don’t even think of using a Phillips head or flat head. Finally, buy a LOT of them, and NOT at Lowes. Tapcon screws are insanely expensive there, and these big ones run out of stock. I probably used 6-8 boxes of 25 screws each to do my single room. Buy them online in bulk if you can.

The Right Mix of Tools and Technique
It took me a couple of nights to get into a rhythm of how to best install the stuff. Let’s start with tools because they mean the difference between extremely slow, and super efficient. You’ll need:

  • Tape measure
  • Drywall square
  • Permanent marker
  • Utility knife
  • Spare 2×4′ board
  • High power CORDED hammer drill for drilling concrete
  • High quality masonry drill bit
  • Another electric drill for drilling countersink
  • Cordless drill/driver for installing Tapcon screws
  • Hand ratchet for finishing off stubborn Tapcon screws
  • Chop saw for cutting furring strips to length
  • Level to ensure furring strips and styrofoam are plumb
  • Ear protection
  • Work gloves

Tools for installing EPS Insulation
A menagerie of Craftsman tools helped me efficiently install the insulation

Working from one corner of the room, you begin by cutting the styrofoam to the height of the block wall so that it fits underneath the floor joists. To cut the material I marked a line with a framing square and permanent marker, then scored the line with a utility knife. The final step was to break the styrofoam over a spare 2×4 as shown below.

Breaking the insulation

Once a couple of pieces of styrofoam are dry-fit into place, you then cut a furring strip to cover the seem between them. Using a level I made sure that the furring strip was vertical, and had my trusty assistant hold it while I went for the hammer drill…

A Special Note on Hammer Drills and Bits
Not all hammer drills are made alike, and neither are masonry drill bits. Trust me. The first rig I used was my Craftsman 19.2V Cordless with the 3/16″ bit provided in the screw box by Tapcon. That was slow and painful. Then I thought I’d try my dad’s Black and Decker corded hammer drill from the 1980s thinking the electric power would help. Nope. I nearly burned out the drill. Check out the lean and grimace I’ve got trying to use that sorry rig.

Hammer drilling

So, I went to Kmart and bought a reasonably priced Craftsman corded hammer drill, and I went to Lowes and bought the toughest sounding 3/16″ masonry bit they had – the Bosch Blue Granite 6″ long Hammer drill bit. This combination cut through concrete like butta, and made this portion of the project take days not weeks!

Drilling and Screwing With Protection
I’m obliged to warn you that I used protection when hammer drilling and screwing. Muffs for the ears and gloves for the hands (padded for my pleasure). The sound reverbed throughout the basement and could have spread a WTD (Work Transmitted Disease). Without gloves, my hands would have developed some nasty sores. OK, enough with the stupid jokes…

  1. I drilled into the concrete
  2. I countersunk the hole
  3. I drove in the Tapcon with the cordless drill and hex driver
  4. I finished off the screw with a ratchet when needed

The end result is a securely fastened piece of Styrofoam insulation with Tapcon screws that are flush on the front so that drywall can be installed directly onto the furring strips without obstruction.

Countersink the furring strips
Closeup of furring strip with countersunk Tapcon screw

Finished Insulated wall
The insulated basement wall completed

This portion of the project took about 5 days, and the end result was actually really fulfilling. I could have very easily left the basement looking like this. It is now insulated, and the blue looks much better than block. Unfortunately I think there is some code that says you need to cover over the Styrofoamwith wall board for fire protection. Well…that and we can’t have Tricia’s clients working out in a half-finished room, now can we?

Next up…how I installed the electricity and painted the ceiling with a Wagner Power Painter.


DIY Basement Workout Room: Step 1 | Step 2 | Step 3 | Step 4 | Step 5

Posted in: Home Improvement, Life | 17 Comments »
Share/Save/Bookmark

“24″ in 1994. Check out the Old School Internet.

Mon, 11 August 2008

This is a great spoof video showing the show 24 as if it were 1994. It reminds me of how far we’ve come in a very short period of time. I love when the boss picks up the phone and cuts off AOL – priceless. There isn’t any point in trying to explain vinyl records and cassette tapes to my kids anymore. Even the interweb look vastly different than it did before they were born. They’ve never even heard modem tones.

Posted in: Life, TV | No Comments »
Share/Save/Bookmark

DIY Basement Workout Room Step 1: The Plan

Thu, 07 August 2008

1037 Castle Bridge Basement Plan

My web activities have slowed to a crawl as we have begun yet another home improvement project in the Rzepkowski household. This time we are finishing an area of our basement to serve as a workout room for Tricia’s personal training business. My web marketing strategery caused an inflow of clients a few months before she may have been fully prepared, so here we are in the middle of the best part of summer locking ourselves “down in the hole” to prep some much needed home fitness space.

I’m going to post a series of entries outlining the project. I’ll try to write down as many notes-to-self as possible so that I don’t make the same mistakes again the next time I go to do some DIY home improvement. If you learn from any of the choices I make, awesome! If you want to comment on what an idiot I am, go for it! I’m way behind on documenting the steps I’ve already done so your advice will likely fall into the too little too late department. Without further ado, let’s get going…

What Are We Going to Do?
This whole thing started with a simple wife whimper, “Honey, I really need a wall between this one part of the basement and the other part so that all the kids’ junk isn’t in the way of my workout sessions.” I said, “OK, a simple stud wall with a door opening will be no problem. Let’s just put it up. So, I got the car keys and just as I was stepping out the door to go to Lowes I thought, “Gee, maybe I should measure a few things.” I brought my expert consultant to the basement and we literally moved furniture around for an hour trying to figure out how to configure the space.

Visio 2003 Beats the Back of a Napkin
After we tired ourselves out, we decided a floor plan was in order. I popped open Visio Professional 2003 on my computer and draw up a plan of the space and the big items we needed to fit. That way the heavy lifting would be done on the computer, not with our back. The plan you see is by no means an expert architectural blueprint. I misused and abused Visio because I didn’t want to spend the time to learn how to do it 100% right. I wanted to get building the friggin’ basement, not become a Visio Jedi Master. Nonetheless here were a few brief tips on how I made a simple drawing above out of Visio.

  1. Create a New Drawing by going to New > Building Plan > Floor Plan. This opens a ton of VERY helpful Visio shapes for creating walls, staircases, furniture, dimensions, etc
  2. Set the Scale under Page Setup > Drawing Scale tab. Measure you long outside walls and fiddle with the scale so that the entire drawing will fit on 8.5 x 11. Trust me, you at least want to do the drawing to scale. This is extremely helpful!
  3. Use the shapes in the Dimensioning – Architectural palette to show precise measurements on your drawing. These measurements allow you to measure on paper for everything from studs to wiring.

The left side of the drawing is what we are currently building. The rest (including the bathroom) are for a future phase. Learn about the tough decisions we made on insulating and waterproofing cement block walls in my next posting.


DIY Basement Workout Room: Step 1 | Step 2 | Step 3 | Step 4 | Step 5

Posted in: Home Improvement, Life | 2 Comments »
Share/Save/Bookmark

Another CMO Bites the Dust: Joan Blackwood Out, Ted Gilvar In

Mon, 04 August 2008

Another CMO gets eaten

Monster moved their marketing program on to seemingly greener pastures by replacing Joan Blackwood with Ted Gilvar as Chief Global Marketing Officer. I met with Joan recently at the Monster Customer Advisory board, 6 months after I was critical of Monster’s new branding campaign. She and I discussed the circumstances of the campaign and both agreed that the timing was pretty poor. Monster hadn’t upgraded their product in months, so the promises of the campaign were not well delivered by the product. I can only imagine the pressure she was under to launch something new. The quick hook (14 months tenure) further bolsters the volatility of the CMO position, and ought to scare the crap out of anyone looking to move up in the marketing profession.

I know that Monster has some pretty extensive product changes coming down the pipe, so perhaps Mr. Gilvar’s original campaign vision will come to life. I can’t wait until our first meeting.

photo by dospaz

Posted in: Interactive Marketing for Staffing Firms, Job Boards | No Comments »
Share/Save/Bookmark

Thousand Islands Mini-Vacation

Wed, 30 July 2008

For our 10th anniversary weekend we headed off to Chippewa Bay in the 1000 Islands for a couple days of fun with our friends Marc and Janet and their kids, Mia and Lucas. On Sunday morning we hooked up our boat and left the house at 9:45. We took a really nice drive east on 104 through all of the eastern Lake Ontario fishing towns like Sodus, Pulaski, Oswego, and Mexico. We arrived at around 12:30pm at the public boat launch. There, we left our boat trailer locked up and drove the boat over to the cabin which was less than half a mile away.

Jesse’s Island
The cabin is at the end of a steep road to the water’s edge. On the land where we stayed was the owner’s cabin, and a guest cabin that the 8 of us stayed in. The cabin is on Jesse’s Island, which I would suppose is one of the 1,793 islands that make up the area.

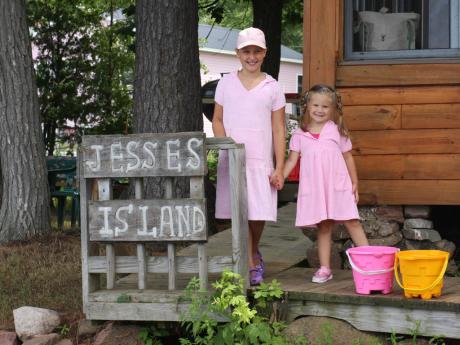
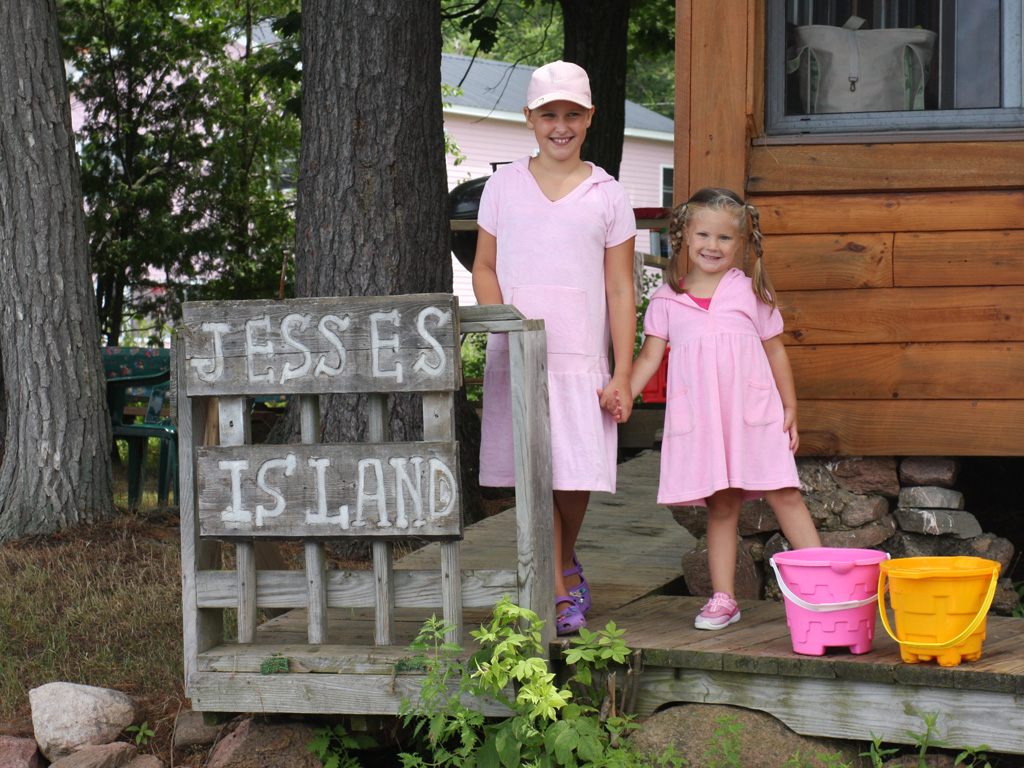
Mia and Anna on Jesse’s Island
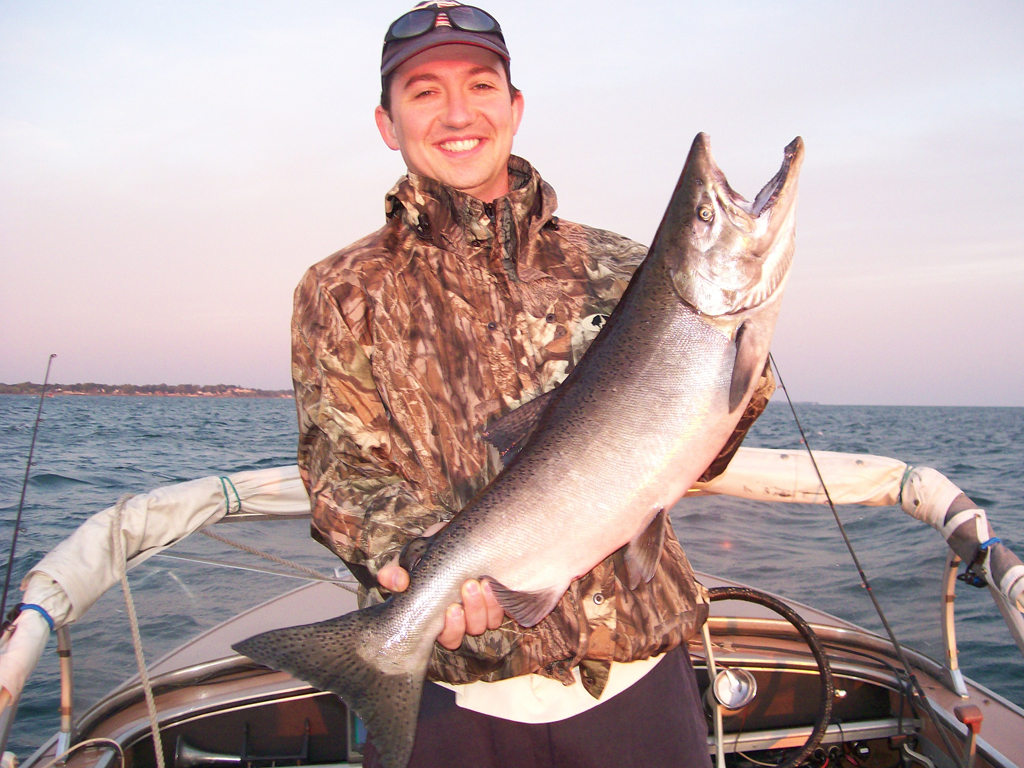
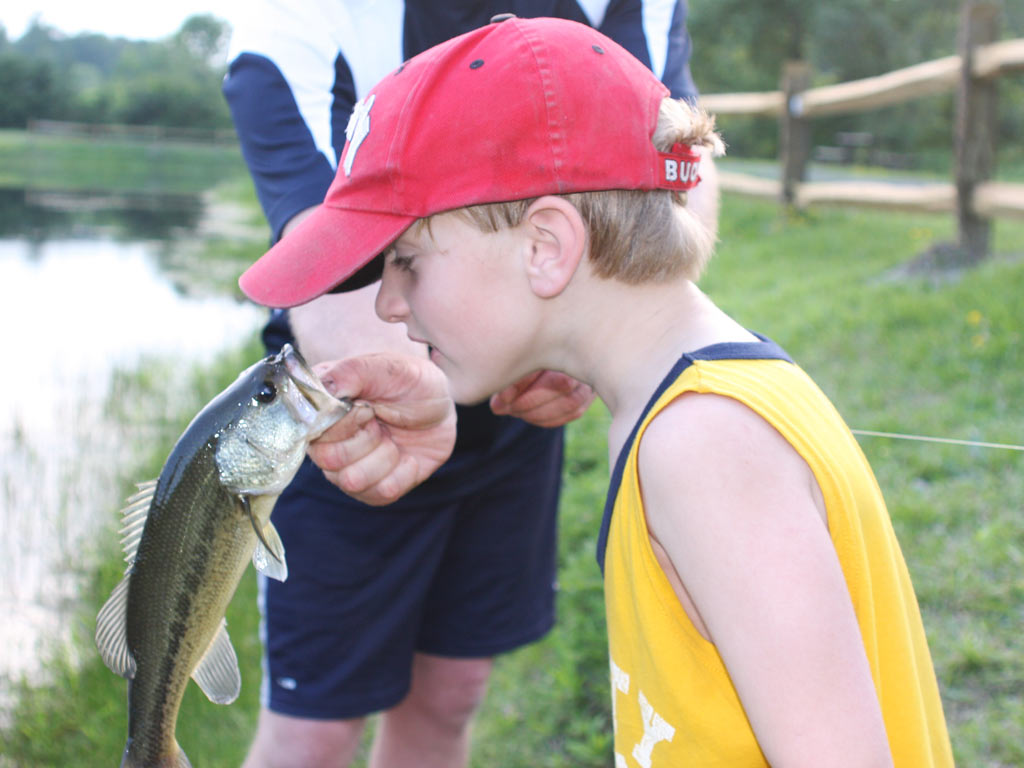
Here Fishy Fishy
The 2 boats at the dock
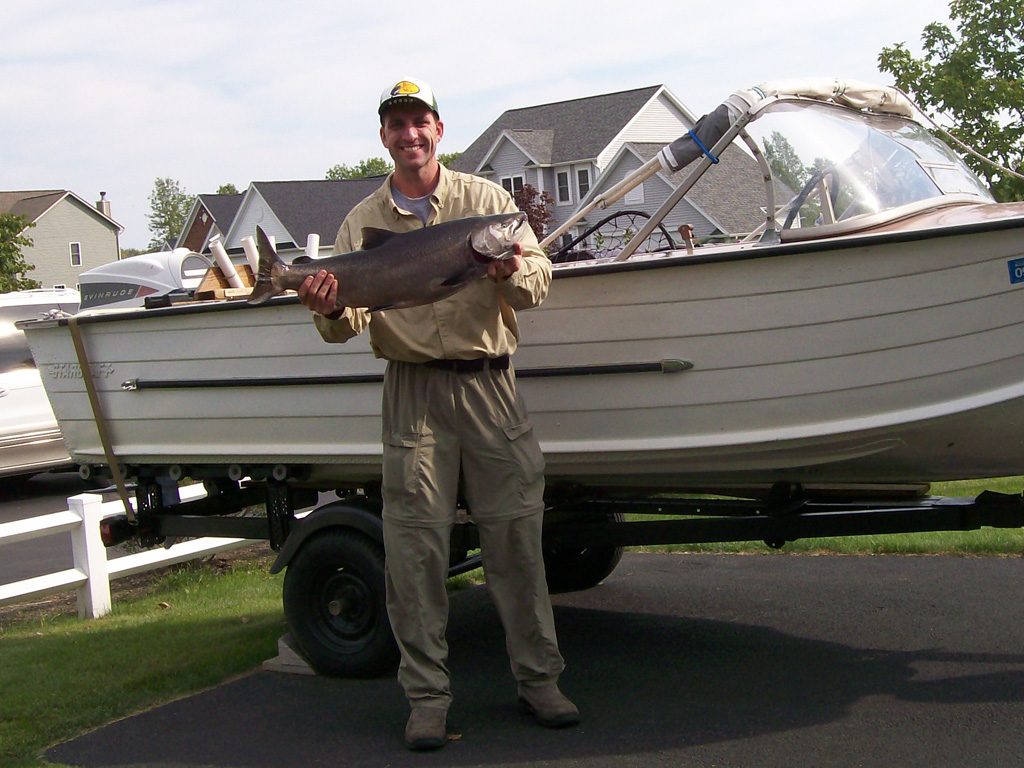
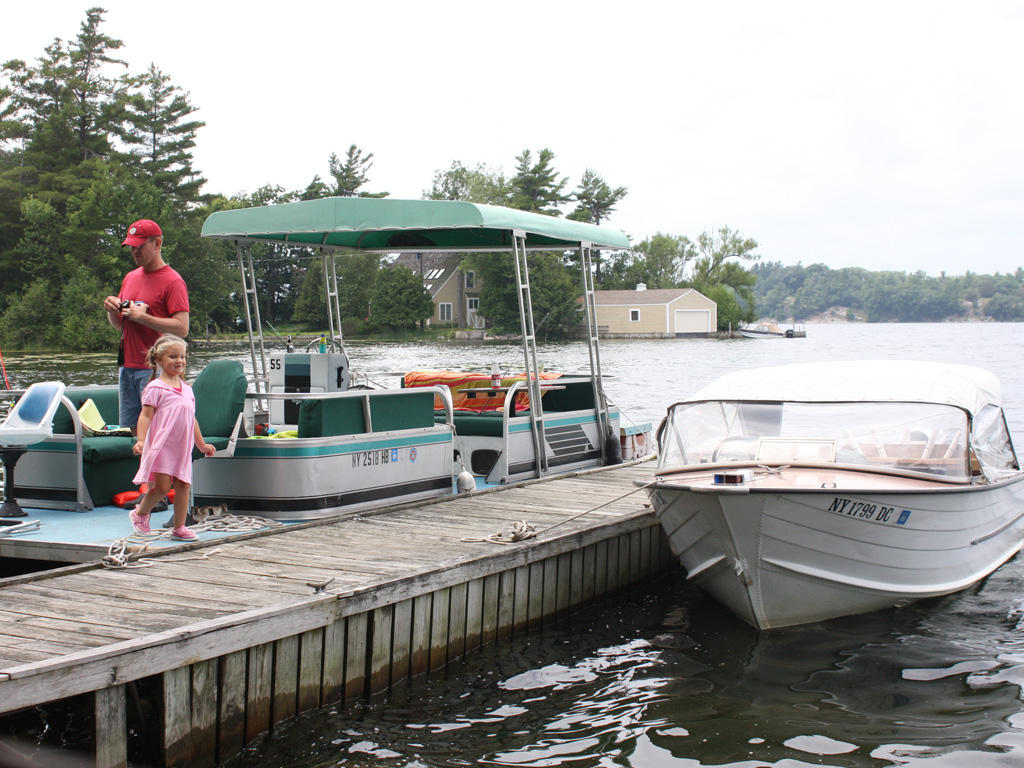
I brought the Fish Fry, but the best “yacht” in the place was the pontoon boat
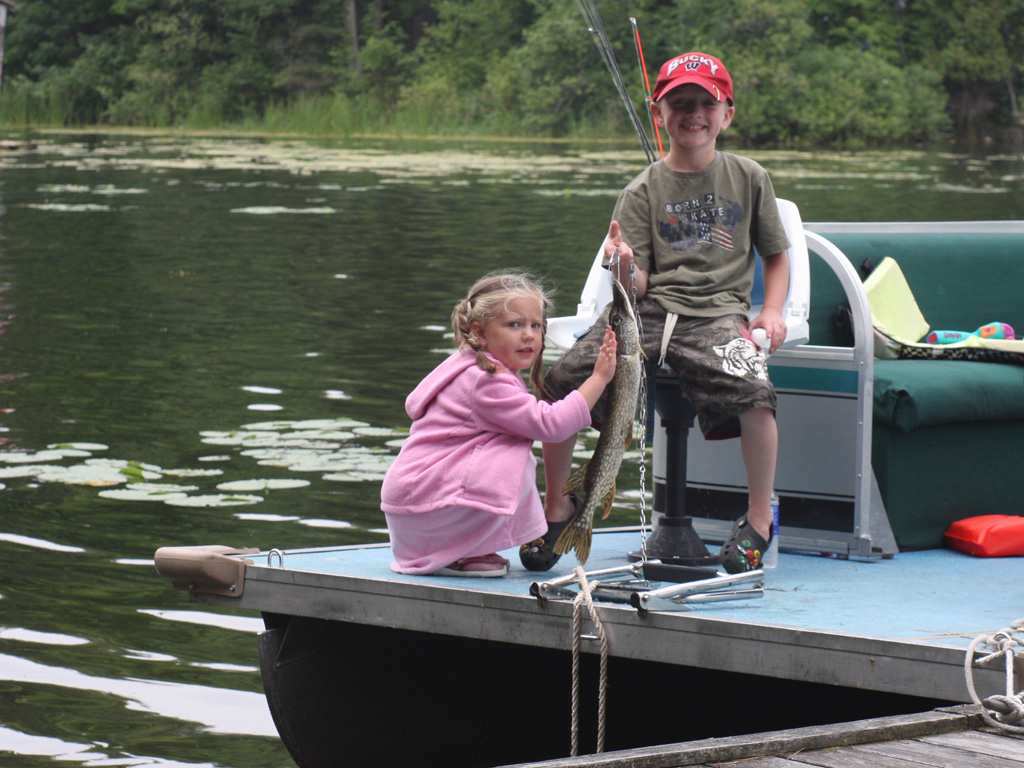
We took the boat out fishing while Marc’s family went on the 24 foot pontoon boat they had rented. We spent a good amount of time out on the water drift fishing with worms. We got tons of small perch. As we peered over to the fishin’ barge we saw Janet hook a nice 3.3 pound walleye, and a small Northern Pike. We knew who we were fishing with the rest of the trip for sure. The pontoon boat worked out much better to get the whole crowd of us to have fishing fun together.

Anna pets a Northern Pike
Anna pets the nice Northern pike lovingly.

Island Hopping
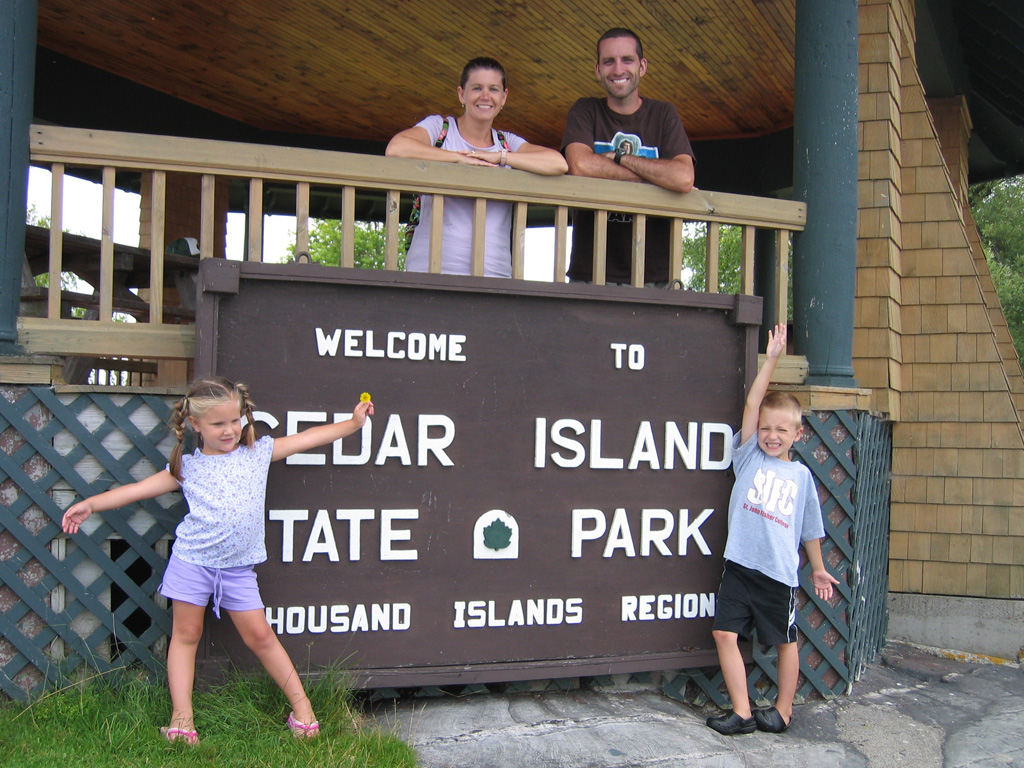
Perhaps the best part of going to the 1000 Islands is island hopping. There was a nice state park right by where we fished every day, so it gave us a chance to explore. The island had a few tent sites and a beautiful picnic shelter. Someday, it might be fun to camp there.
Cedar Island State Park
We parked the boat on shore and poked around the island.

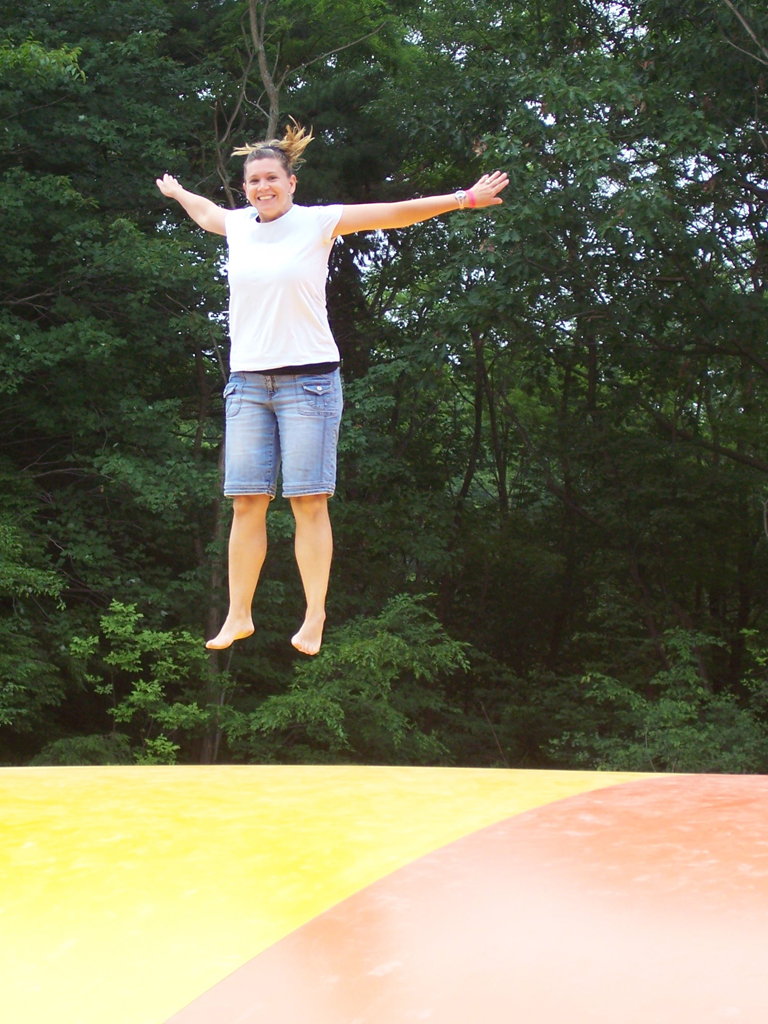
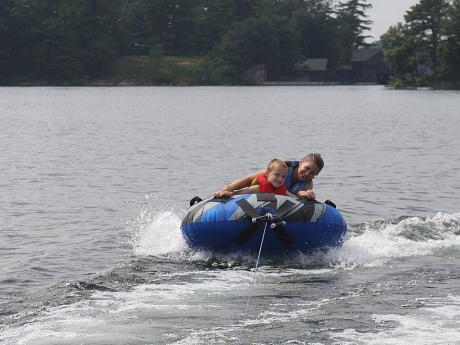
Mason and Anna Go Down the Tubes
On Monday afternoon the weather was kind of crummy and we had been fishing all morning. Rather than sit inside, I thought we could try a water activity. Heck, we were going to get wet anyway. I had purchased an inexpensive tube and tow rope from Dick’s to bring with us on the off chance that I might entice one of the kids to hop in the water and get dragged around by the boat. Sure enough, Anna was game for the adventure, but Mason wasn’t feeling well.

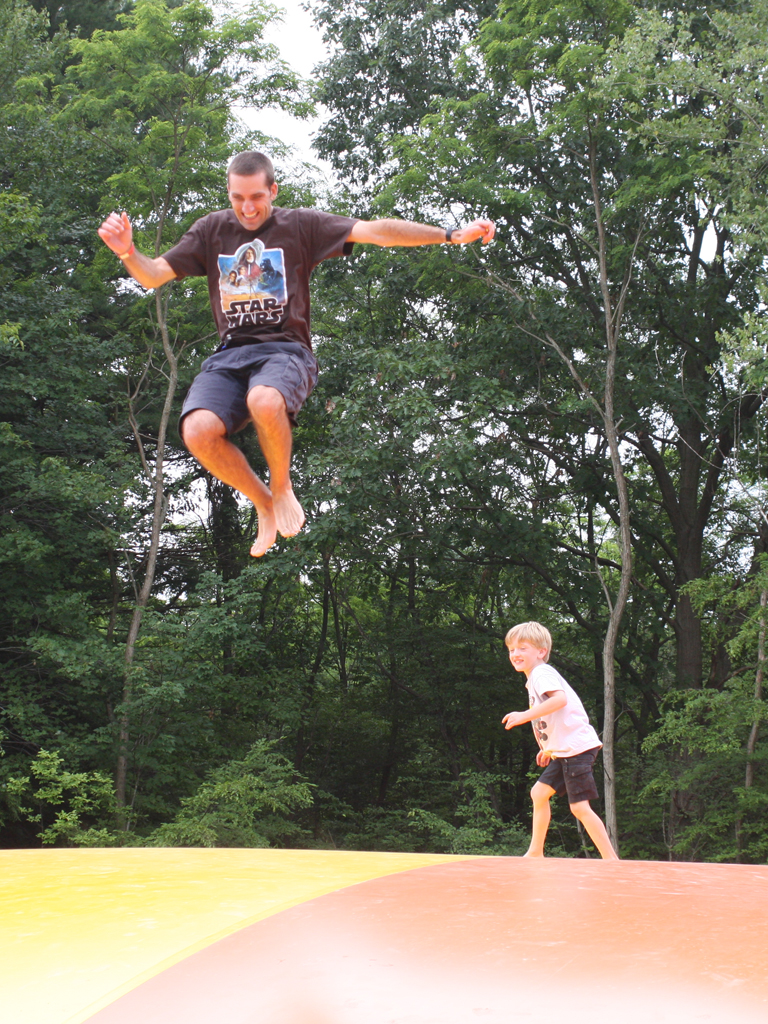
We took out the pontoon boat, hooked up the tube, and I hopped in for a trial run. Anna saw me getting dragged around having a good time, but was a little concerned when I flipped off the tube after doing some tricks. Nonetheless, she hopped into the tube giving me explicit instructions not to go fast or do tricks to flip us off. Well, I had Marc start off really slow. After a while we sped up a bit more, and Anna was having a blast! We talked the whole time together about how much fun we were having. Then I had Marc goose the throttle a bit more so we could get the tube on plane and get my legs out of the water. That’s when Anna had enough. She started to scream like she does on a kiddie coaster, “This is a nightmare!, This is a nightmare!”. I just thought that was priceless. So, we slowed down and congratulated Anna on her first tube ride. (The pictures are still on Marc’s camera). It was awesome!

Mia and Lucas both had their first turn on the tube as well (with Marc and Janet riding along). They both had a blast in their first experiences too. We went in after the first round of tubing to pick up Mason and Tricia. Luckily Mason was feeling better and he wanted to give tubing a whirl. Tricia was the first to take him out. She had the boat up to full speed, and had Mason outside of the wakes! He loved it. Then it was my turn to go out with the boy. I got even more aggressive with it at full speed, and he just never wanted to quit. Nothing beats the smiles that the whole crew had on their faces.

Mason and Tricia Tubing
Tricia takes Mason on his first tube ride

Kris and Mason tubing together
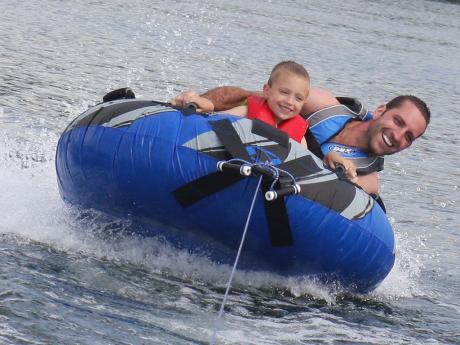
Kris and Mason go outside of the wakes

Tourist Fun
We also had a chance to check out a few spots in the tourist mecca of Alexandria Bay. My favorite, of course is the 1000 Islands Bait Store, the ultimate fishing shop. My kids really liked our scavenger hunt at Mazeland. Mazeland is a labyrinth of bushes that you try to find your way through. You go through it looking for letters that make up the word of the day. If you get the word of the day right, the kids get a prize, and the adults were entered into a drawing for one too. Mason enjoyed the life sized chess board in downtown Alex Bay. When we got back from the trip all he wanted to do was learn to play chess. That is one of his new favorite things.

Krolczyk family at Cedar Island
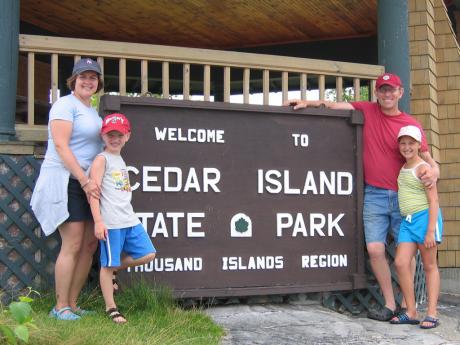
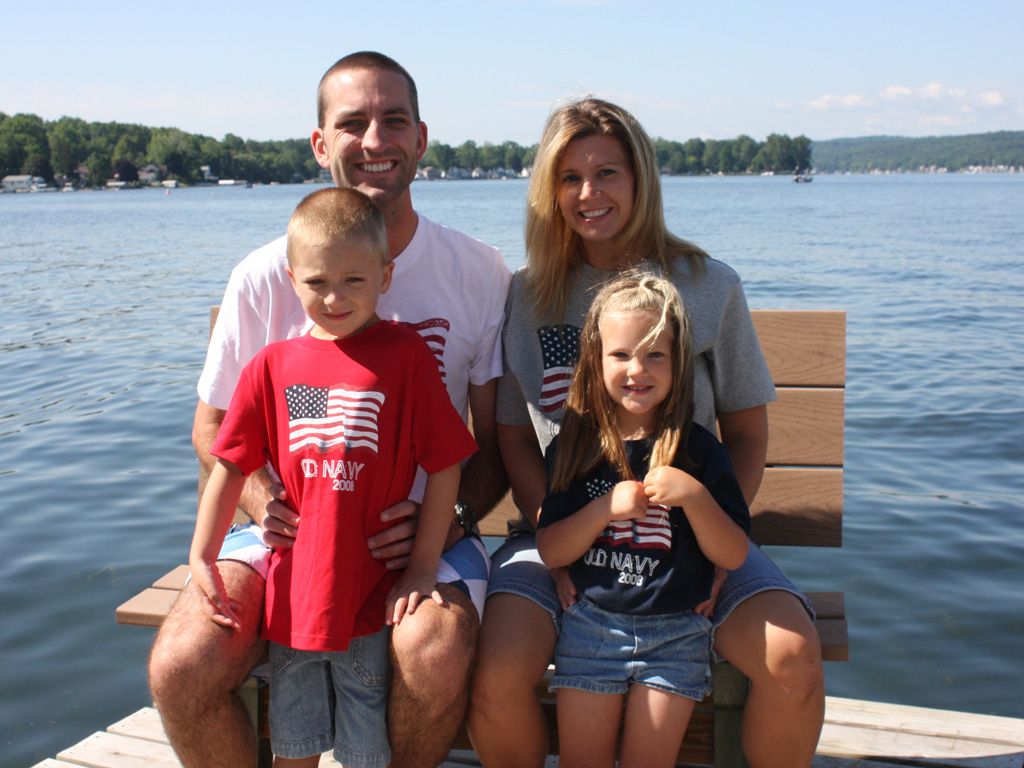
The Krolczyk clan in their favorite part of the world

Thanks to Marc, Janet and the kids for sharing their yearly family vacation with us. It was a lot of fun.

Posted in: Family and Friends, Fishing, Life, Travel | No Comments »
Share/Save/Bookmark

Setting Up a Legal Review Center, Reality Style

Wed, 30 July 2008

Live and direct from the Hudson homepage today is the 3rd episode of the online video magazine that has been a labor of love for me. The shoot for this video was a ton of fun. I had never been to Philly before, so visiting a new city and catching a ballgame was awesome.

I also really got to know Ed Caufield, the highest quality human you could meet – seriously. Not many people are enthusiastic about having a camera in their face while they do their job, but Ed embraced the project wholeheartedly. Whereas some people need directing, Ed had the locations for the shoot planned out for us. Ed is also Mr. Philadelphia. He is such a genuine and likable person, that he knows everyone in the building from the top manager to the parking lot attendant. When he walks down the street people honk their horn and say “Hey Ed what’s up!”. He’s just that nice, and that much fun to work with.

So, enjoy the vid, and let me know what you think.

Posted in: Interactive Marketing for Staffing Firms, Projects, Web Video | No Comments »
Share/Save/Bookmark

aboutkris

This is my Life as a 36 year old husband and father of two and my Work as an Interactive Marketing Director currently telecommuting to Hudson in Chicago from home in Rochester, NY.
more about me...

archivedkris

shades of k © 2000-2011, Kris Rzepkowski | powered by: WordPress, hosted by: Bluehost